
Dishwasher Leaking Water: Causes and Fixes
 August 1, 2026
17 min read
August 1, 2026
17 min read
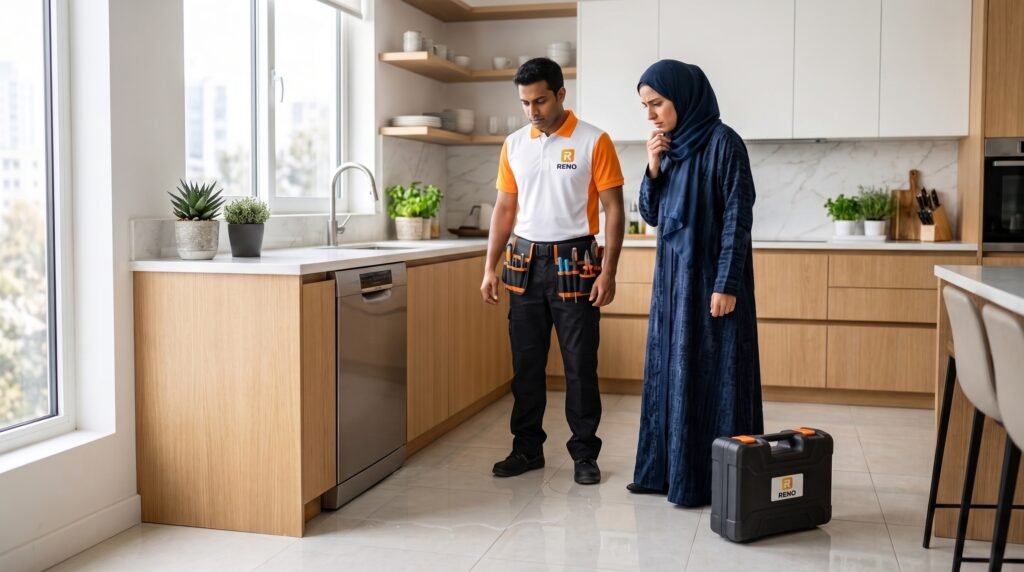
A dishwasher leak rarely starts where the puddle appears. Water can travel along a hose, cabinet edge, insulation layer, or grout line before reaching the kitchen floor. That makes the first wet point more useful than the size of the puddle.
The fault also carries real property risk. An efficient dishwasher can use about 12.1 liters of water per cycle, while older standards allow about 18.9 liters. Even part of that volume can reach cabinets, floor joints, electrical points, or the apartment below.
This guide explains why a dishwasher leaks from the door, bottom, side, or rear. It also covers worn seals, split hoses, excess foam, cracked sumps, blocked drainage, safe DIY checks, technician-only faults, apartment-liability concerns, and the likely cost of dishwasher repair in Dubai.
Why is your dishwasher leaking water?
Your dishwasher is most likely leaking because its door seal cannot contain spray water. Loose inlet or drain connections come next. Excess foam ranks third because unsuitable detergent can carry water over the lower door edge.
Manufacturer guidance identifies damaged gaskets, loose water connections, blocked filters, overfilling, pump seals, unsuitable detergent, and poor appliance levelling as leak causes. Some separately identify worn gaskets, loose hose clamps, blocked waste routes, excess detergent, and door-vent faults.
No manufacturer publishes one cause-frequency dataset covering every dishwasher brand, model, age, and installation. The table therefore ranks faults by diagnostic order and visible leak pattern, not by invented percentages.
The cause-likelihood table links each symptom to the component that deserves inspection first.
| Inspection rank | Likely cause | Typical leak point | Safe owner action |
|---|---|---|---|
| 1 | Dirty, flattened, torn, or hardened door seal | Front edge or lower corner | Clean and inspect the seal |
| 2 | Loose clamp or split inlet or drain hose | Rear, side, or underneath | Tighten an accessible clamp |
| 3 | Excess foam from unsuitable detergent | Lower door edge and front floor | Remove foam and correct detergent |
| 4 | Misaligned door, rack obstruction, or worn latch | One front corner | Check loading and appliance level |
| 5 | Blocked filter, drain route, or float movement | Front edge or base tray | Clean accessible parts |
| 6 | Cracked sump, pump seal, inlet valve, or tub | Centre base or concealed area | Stop using and book a technician |
A dishwasher leaking from the door points first to the gasket, detergent, loading, latch, or cabinet alignment. A dishwasher leaking from the bottom points more strongly to hoses, pumps, the sump, the inlet valve, or an overfill fault.
What causes a water leak?
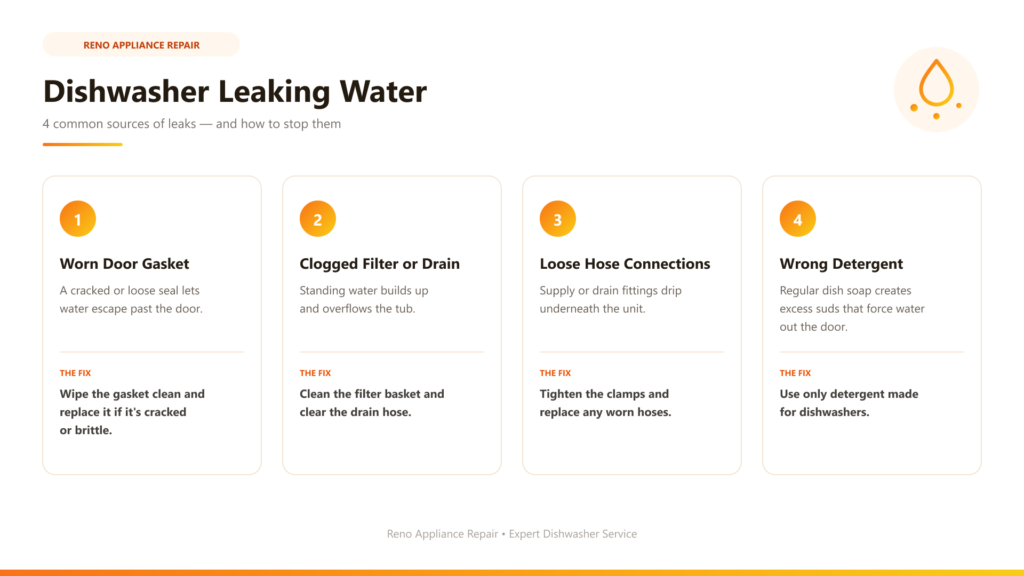
A dishwasher leaks when water escapes the parts that fill, contain, circulate, or drain it. Those parts include the door gasket, tub, sump, hoses, clamps, pumps, float assembly, inlet valve, drain connection, and base tray.
How does a worn or hardened door seal leak from the front?
A worn door seal creates a narrow opening between the door and tub. Pressurized spray water reaches that opening and runs down the front panel or lower corner.
The door seal, also called the tub gasket, compresses whenever you close the dishwasher. Grease, food deposits, detergent residue, heat, and mineral scale can stop the rubber from sitting evenly.
Check the seal for 5 visible conditions:
- Tears or cuts in the rubber
- Flattened sections that do not rebound
- Hardened or glossy surfaces
- Food particles and greasy biofilm
- Corners pulled from the gasket channel
Inspect the tub seal for cracks, tears, incorrect placement, food particles, and objects trapped between the door and tub. A gasket with tears, cuts, or wear may no longer create a watertight seal.
Cleaning can correct a dirty seal. Cleaning cannot restore missing rubber, permanent flattening, deep cracks, or hardened material. Those conditions require a model-compatible replacement.
How does a split inlet or drain hose leak under the machine?
A split hose releases water beneath the dishwasher during filling or draining. A loose clamp creates a similar leak where the hose joins a valve, pump, or waste fitting.
The inlet hose carries pressurized supply water into the dishwasher. An inlet-side leak can continue whenever the isolation valve remains open, even after the wash programme stops.
The drain hose carries used water toward the sink waste connection. A drain-side leak usually becomes visible when the drain pump activates.
Inspect both hose ends for:
- Droplets around the connection
- White or brown mineral tracks
- Cracked or swollen rubber
- Abrasion against cabinet edges
- Corrosion around metal clamps
- Dampness inside the sink cabinet
Check the shut-off valve and loose hose clamps when water appears beneath the adjoining cabinet. Check supply and drain connections, tighten loose fittings, and replace damaged lines.
Replace a split pressurized hose. Tape, sealant, or an extra clamp does not rebuild the damaged hose wall.
How does a cracked sump or tub leak into the base tray?
A cracked sump or tub releases wash water below the main wash chamber. The water then collects in the base tray or escapes beneath the cabinet.
The sump forms the lower reservoir beneath the filter. The circulation pump draws water from this reservoir and pushes it through the spray arms.
A sump or pump-seal leak may appear only during the wash stage. Circulation pressure stresses the failed joint after filling has finished. A low tub crack can leak during filling, washing, and rinsing.
Standing water in the base tray confirms an internal leak path. It does not identify whether the source is the sump, pump, valve, hose, or tub.
Whirlpool connects center-bottom leakage with the pump, diverter, motor-shaft seal, sump, and overfill conditions. The manufacturer recommends professional service for cracked tubs, inlet-valve faults, and persistent pump or diverter leakage.
Drying the tray and restarting the dishwasher only resets the symptom. The same failed component can release water during the next cycle.
How does a misaligned door or worn latch break the seal?
A misaligned door compresses one gasket section more than another. Water escapes through the side with weaker compression.
A dishwasher can move out of square when its feet sit unevenly or its cabinet fixings pull the frame sideways. A protruding utensil or oversized plate can also hold the door slightly open.
A dishwasher must sit level and square in its cabinet. The tub opening can distort when installation is uneven, preventing the door from sealing correctly.
Compare the gap around the closed door. One wider side, a dropped corner, or a door requiring extra pressure suggests alignment, hinge, or latch trouble.
How does excess foam from the wrong detergent force water out?
Excess foam expands above the normal water line and carries water through the lower door seal. Hand-washing liquid produces far more suds than automatic dishwasher detergent.
Foam also changes spray behavior. The circulation pump mixes bubbles with water, creating a light mass that reaches door gaps and vents.
Dish soap must not enter a dishwasher. Hand-washing liquid, excess automatic detergent, and soap residue left on prewashed dishes can produce enough suds to force water through the door.
Stop the programme when foam appears. Isolate the appliance, remove visible suds, and follow the model manual before starting another cycle.
How does a blocked overflow route water to the floor?
A blocked filter or drain path slows water removal. Retained water can then rise toward the lower door edge or enter the base tray.
A sticking float creates a related overfill fault. The float rises with the water level and activates a switch that controls filling. Grease, broken glass, or food debris can restrict movement.
Blocked filters, obstructed drainage, and floats that cannot move freely are the major causes of dishwasher leaks. A blocked air gap can prevent wastewater from escaping near compatible sink installations.
Not every Dubai kitchen uses an air gap. Some dishwashers connect through a raised drain-hose loop or another approved arrangement. Check the actual installation and appliance manual.
How do you diagnose a water leak step by step?
Diagnose a dishwasher leak by finding the first wet point during a controlled cycle. Stop testing when water reaches electrical parts, cabinetry, flooring, or an adjoining apartment.
- Identify the leak point: Door, base, side, or rear
Dry the floor, door edge, kick-plate area, sink cabinet, and visible hoses before testing.
Use the first location as a component signal:
- Door: Gasket, foam, latch, loading, spray direction, or alignment
- Base: Sump, pump seal, float, valve, internal hose, or tub
- Side: Internal hose, vent, frame channel, or traveling water
- Rear: Inlet hose, drain hose, supply valve, or sink connection
Water beneath the front edge can still begin at the rear. Built-in cabinets often hide the travel path.
- Run a short cycle and observe where water first appears
Run the shortest suitable programme only after confirming that no electrical hazard exists.
Watch the cycle in 4 stages:
- Observe filling. Check the inlet hose, supply joint, and inlet-valve area.
- Observe washing. Check the door corners, underside, sump, and pump area.
- Observe draining. Check the drain hose, pump outlet, and sink waste fitting.
- Observe stopping. Check whether water continues entering after filling ends.
Close the water valve and isolate electrical power as soon as the first droplet appears.
- Inspect the door seal for tears, hardening, and biofilm
Wipe the entire gasket with a white cloth. A pale cloth exposes grease, black residue, detergent deposits, and hidden food particles.
Press several sections with one finger. Flexible rubber returns to shape. Hardened rubber remains compressed or feels rigid.
Inspect both lower corners carefully. Gravity carries residue toward these points, and a small obstruction can break the seal during spray circulation.
- Check hose clamps and connections at both ends
Inspect the inlet hose at the supply valve and dishwasher connection. Inspect the drain hose at the pump outlet and sink waste connection.
Wrap a dry tissue around each accessible joint. A slow leak marks the tissue before creating a visible puddle.
Tighten only a clearly loose and accessible clamp. Stop when a connection is cracked, corroded, cross-threaded, electrically obstructed, or hidden behind the cabinet.
- Check the base tray for standing water
The base tray sits beneath the tub on many models. The tray catches internal leakage and may contain a safety float.
Water in the tray confirms that the dishwasher failed to contain water internally. The tray does not reveal which component failed.
Some leak-protection systems stop filling and run the drain pump after water reaches the tray. A Bosch dishwasher specification, for example, describes AquaStop as containing a detected leak, shutting down operation, and pumping out water. The exact response depends on the model.
Which checks can you safely do yourself?
You can inspect visible parts, clean accessible surfaces, correct detergent use, and tighten a loose external clamp after isolating the appliance.
- Locate the first wet point at the door, base, side, or rear.
- Wipe and inspect the gasket for residue, tears, and hardening.
- Clear food debris from the accessible filter and float area.
- Remove utensils or dishes blocking the door or spray arms.
- Tighten a visibly loose and accessible hose clamp.
- Switch to automatic dishwasher detergent only.
- Level the appliance according to its installation manual.
- Stop testing when water approaches wiring, sockets, or flooring.
DIY versus technician decision box
DIY check: dirty gasket, blocked filter, protruding utensil, unsuitable detergent, movable float obstruction, or loose accessible clamp.
Technician repair: recurring base-tray water, cracked plastic, live inlet leak, failed latch, pump leak, internal hose damage, AquaStop failure, or split tub.
The Bosch safety manual instructs users to disconnect power, switch off the fuse, close the water tap, and contact service when an appliance becomes damaged. It also limits appliance repairs to trained specialists.
Which of these faults need a technician?
A cracked sump, split tub weld, failed AquaStop valve, and internal hose behind the cabinet fall outside safe DIY work and require specialist home appliance repair.
Professional diagnosis also applies when:
- Water continues entering after the fill stage
- The drain pump runs without stopping
- The breaker trips during a leak
- Water reaches a motor, socket, plug, or wiring loom
- A built-in dishwasher needs cabinet removal
- The sump or pump leaks under circulation pressure
- The leak returns after cleaning and levelling
AquaStop is more than a normal supply hose. Bosch describes an integrated system whose effectiveness depends on correct installation, electrical connection, compatible original parts, and the protected section beginning at the AquaStop connection.
A cracked tub can cost enough to make replacement more practical. Compare appliance age, written diagnosis, parts availability, labor warranty, and replacement cost before approving major work.
How much does it cost to fix a water leak in Dubai?
A Dubai dishwasher leak repair commonly costs AED 150 to AED 1,000 or more. The cause, brand, cabinet access, replacement part, testing time, and warranty determine the final amount.
The table contains planning ranges set on 30 July 2026. These figures are not regulated tariffs. Ask for a written quote showing diagnosis, labor, parts, value-added tax, cabinet removal, testing, and return visits.
| Leak cause or service scope | Planning cost in AED, set 30 July 2026 | Main cost factor |
|---|---|---|
| Diagnosis or call-out | AED 150 to AED 250 | Testing and fee-credit policy |
| Seal cleaning or minor adjustment | AED 150 to AED 300 | Labour and access |
| Filter or minor blockage correction | AED 150 to AED 350 | Cleaning and drain testing |
| Door seal replacement | AED 300 to AED 600 | Part price and model compatibility |
| Clamp or waste-connection correction | AED 150 to AED 350 | Fittings and sink-cabinet access |
| Inlet or drain hose replacement | AED 250 to AED 550 | Hose type and cabinet removal |
| Latch or alignment repair | AED 250 to AED 500 | Latching, hinging, mounting, or levelling |
| Float switch or inlet valve repair | AED 300 to AED 700 | Electrical testing and part cost |
| Pump, sump, or internal hose repair | AED 450 to AED 900 | Strip-down time and component price |
| Cracked tub or major assembly | AED 700 to AED 1,000+ | Part cost and repair economics |
A Dubai market guide dated 20 June 2026 places diagnosis near AED 150 to AED 250. It places filter, blockage, hose, or minor labor work near AED 150 to AED 350, while pumps, valves, seals, and related parts commonly reach AED 300 to AED 800. Motor, board, or complex work can exceed AED 1,000.
A second Dubai service benchmark places many diagnosis or simple repair visits between AED 150 and AED 700, with specialist parts and cabinet access increasing the quote. These ranges support budgeting, not a final invoice.
Where exactly is your dishwasher leaking from?
The first leak location narrows both the failed component and the apartment-damage risk.
| First visible point | Likely component | Immediate action | Dubai apartment risk |
|---|---|---|---|
| Lower door centre | Foam, lower seal, blocked filter | Stop the cycle and inspect detergent | Water spreads across the kitchen floor |
| One front corner | Gasket, latch, obstruction, misalignment | Check closure and appliance level | Repeated flow reaches cabinet joints |
| Centre underneath | Sump, pump seal, tub, float | Isolate power and water | Hidden water remains beneath cabinetry |
| Rear during filling | Inlet hose, valve, supply joint | Close the supply valve | Pressurized leakage can continue |
| Rear during draining | Drain hose, pump outlet, waste fitting | Stop the cycle and inspect drainage | Dirty water enters the sink cabinet |
| Base tray only | Internal hose, sump, valve, pump | Do not reset repeatedly | Concealed leakage can recur unseen |
This leak-point map supports the liability question. A dishwasher hose failure differs from a leak in a fixed supply pipe, waste connection, or building service.
Record the first wet point before pulling the dishwasher forward. Moving the appliance can spread water and erase the original track.
Why is a dishwasher leak an urgent fault in a Dubai apartment?
A dishwasher leak is urgent because escaped water can reach cabinets, electrical points, floor joints, and the unit below before the visible puddle becomes large.
One efficient cycle may contain up to about 12.1 liters of water. A machine meeting the older 5-gallon standard may use about 18.9 liters. The full cycle volume does not escape in every fault, but those figures show why an unattended leak needs prompt isolation.
How does a leak reach the neighbouring unit through a slab?
Water reaches a neighbouring unit through pipe penetrations, slab cracks, wall junctions, floor joints, and openings around building services.
Water can first move sideways beneath tiles, cabinets, or underlay. A ceiling mark below may therefore appear away from the dishwasher’s exact position.
The travel rate depends on the released volume, waterproofing, grout condition, floor build-up, and available openings. No single time estimate applies to every Dubai apartment.
Notify building management when water reaches fixed property. Access to the apartment below can help distinguish a surface spill from continuing concealed leakage.
What does a building maintenance claim require from the tenant?
A building maintenance claim requires prompt notice, dated evidence, tenancy documents, and a clear record of the suspected source.
Keep 7 records:
- Photos of the first wet point
- A video showing the active leak
- The cycle stage when water appeared
- The dishwasher model and serial number
- Written messages to management and the landlord
- Technician findings and repair invoices
- Photos of floor, cabinet, wall, or ceiling damage
Dubai Law No. 26 of 2007 states that tenants must maintain rental property as an ordinary person would maintain personal property. Article 21 also separates normal wear and damage beyond the tenant’s control from disputed damage. Contract terms and the actual failed component remain relevant.
The Dubai Rental Disputes Center lists the latest Ejari, identification, correspondence, notices, management documents, utility evidence, and other supporting records among documents used for rental claims. Supporting documents require Arabic submission or legal Arabic translation.
The cause determines the practical responsibility:
- A tenant-owned appliance hose points toward appliance maintenance.
- A failed fixed supply pipe points toward property maintenance.
- Delayed reporting can increase otherwise preventable damage.
- The tenancy contract can allocate minor maintenance separately.
This information provides general context and does not replace legal advice.
How does the anti-flood device limit damage before you arrive home?
An anti-flood device detects escaped water and restricts further filling by closing a valve, stopping operation, or activating drainage.
Selected AquaStop systems protect against water damage when the appliance remains correctly installed and connected to electricity. Bosch excludes supply fittings located before the AquaStop connection from that protection.
A Bosch dishwasher specification describes a 24-hour AquaStop system that detects leaks, shuts down operation, and pumps out water. Features differ between models, so confirm the system through the model specification.
Anti-flood protection limits damage. It does not repair the failed hose, seal, valve, pump, or sump.
Which related dishwasher problems share the same cause?
Several common dishwasher problems share the same water-containment and water-control components.
- Anti-flood system cutting the fill: Base-tray water can raise the safety float and stop the inlet system.
- Dishwasher door not sealing: A worn latch, distorted tub, obstructed rack, or damaged gasket can cause poor closure and front leakage.
- Dishwasher door-seal failure: A hardened, flattened, or torn gasket connects the door-seal component directly with front-edge water loss.
- Dishwasher float-switch fault: A blocked or failed float switch can cause overfilling or a false anti-flood response.
- Dishwasher drain-hose problem: A loose, split, kinked, or blocked drain hose can cause leakage, slow drainage, or wastewater return.
Water that does not enter and water that enters but escapes represent two ends of the same water circuit. The failed component carries the context between both symptoms.
Start a front leak diagnosis with the seal, detergent, loading, and alignment. Start a bottom leak diagnosis with hoses, the sump, pumps, valves, and base tray. That sequence protects the kitchen and limits unnecessary part replacement.
Stop the leak before the damage spreads
A dishwasher leak becomes easier to control once the first wet point is identified. Water at the front usually points to the seal, detergent, loading, or door alignment. Water underneath points more strongly to hoses, the sump, pumps, valves, or the base tray.
Start with the visible, low-risk checks. Clean the gasket. Inspect the filter. Check accessible hose joints. Confirm that only automatic dishwasher detergent entered the machine.
Stop testing when water reaches wiring, flooring, cabinetry, or concealed parts. A recurring base-tray leak, cracked sump, failed AquaStop valve, split tub, or hidden internal hose needs professional diagnosis.
In a Dubai apartment, quick action protects more than the appliance. Shut off the water, isolate power, record the leak point, and notify building management when the fixed property or the unit below may be affected. The smallest puddle can still come from a pressurized connection, so the source matters more than the visible amount.
FAQs
Yes. Inlet faults leak during filling, sump faults often leak during washing, and drain-hose faults usually appear during draining.
An internal hose, pump, valve, or sump can leak inside the cabinet, allowing the base tray to collect water before it reaches the floor.
Yes. A new seal can leak when it is fitted incorrectly, twisted in its channel, obstructed by debris, or compressed unevenly by a misaligned door.
No. A damaged inlet hose or supply connection can keep leaking while the water valve remains open, even after electrical power is disconnected.
Ahmed Al Mansoori
Ahmed Al Mansoori is a UAE-based home appliance repair specialist with over 12 years of hands-on experience in diagnosing and repairing washing machines, refrigerators, dishwashers, ovens, dryers, and other household appliances across Dubai and Abu Dhabi. He has worked with leading appliance brands and is known for delivering reliable repair solutions, preventive maintenance guidance, and same-day technical support for residential clients. Ahmed specializes in troubleshooting modern smart appliances and energy-efficient systems commonly used in UAE homes.
